
How to Use a Knife Sharpener: Sharpening Knives and Scissors Made Easy
Posted by Cody Kendall on Jul 16th 2026
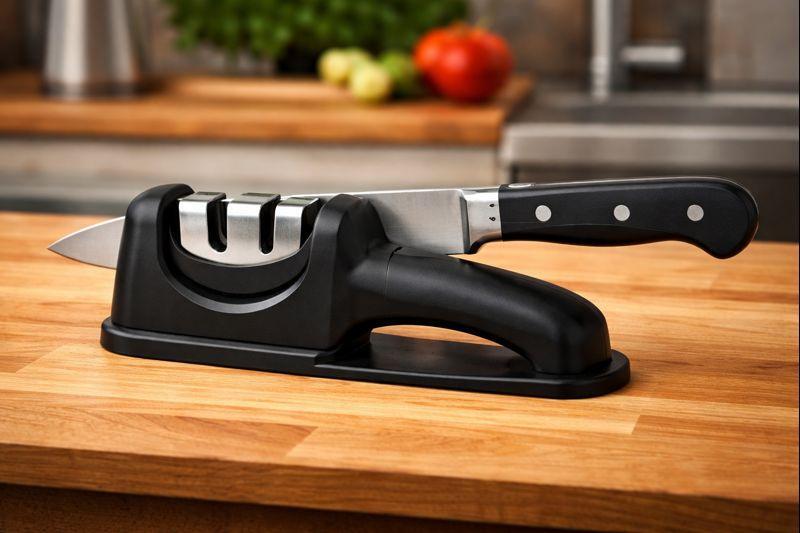
Learning how to use a knife sharpener comes down to two things: repeatable angle control and a simple routine. When you understand your knife edge and keep the edge angle steady, you can sharpen knives faster, waste less metal, and keep kitchen knives cutting clean. This guide also covers scissors, so you can maintain more edged tools without guessing.
Understanding Knife Sharpeners
A knife sharpener removes tiny amounts of metal to rebuild the cutting edge. Different sharpeners do that in different ways, and the difference matters.
Some tools aim for speed. Others aim for control. A pull-through sharpener can improve a dull knife quickly, but it can also remove more material than you need. An electric unit like chef's choice can be convenient, but it still depends on good technique and the right slot for your knife.
A guided knife sharpener and a sharpening stone setup gives you the most control over edge geometry. You choose the edge angle, manage the sharpening process, and refine the blade in steps. That control helps you maintain a decent edge longer and makes it easier to repeat results on your next knife sharpening session.
You will also hear about maintenance tools. A honing rod, honing steel, or sharpening rod helps keep knife edges aligned between sharpenings. A ceramic rod, diamond steel, or leather strop can also refine the edge, depending on the abrasive.
How Knife Sharpeners Work
Every sharpener follows the same basic rule. Abrasives shape the bevel until both sides meet at a clean apex.
That sounds technical, but it is simple in your hands:
- The abrasive contacts the bevel.
- It removes a controlled amount of metal.
- It creates a new apex at the knife edge.
- It leaves a burr you then remove or refine.
That burr is normal during initial sharpening. You feel it when the edge flips a tiny lip of steel to the opposite side. Once you form a burr from heel to tip, you know you reached the edge.
Angle and pressure do the heavy lifting here. A constant angle creates a clean bevel. Consistent pressure keeps scratch patterns even. When you switch to lighter strokes at the end, you clean up the burr and tighten the sharp edge.
Grit also changes the outcome. A coarse abrasive reshapes fast. A finer grit improves sharpness and polish. Your grit size progression is what turns “kind of sharp” into “can easily slice paper.”
Choosing the Right Sharpener
The best sharpener is the one that fits your knives and your habits. Use these quick filters to choose well.
- Match the sharpener to your knives.
- For most kitchen knives, a guided system or stone-based approach gives clean results.
- For Japanese knives, a guided system helps hold a lower angle without wobble.
- For western knives, a slightly higher angle often holds up better for daily board work.
- For serrated knives and serrated edges, you usually maintain the bevel side rather than grinding both sides aggressively.
- For ceramic knives, skip casual pull-through tools. Ceramic needs specific abrasives and careful technique.
- Know what you sharpen.
If you sharpen mostly chef knives and paring knives, a guided system and stones make sense. If you touch up pocket folders, a stable jig still helps, but the blade size changes how you hold it. - Decide how much control you want.
A guided system keeps the angle stable. This matters when you want knives sharp without trial and error. It also helps you keep your knife flat to the table and avoid rocking. - Use a stable setup.
Work on a stable surface with good lighting. If the base shifts, your edge angle shifts. - Do not buy based on price alone.
You can find a cheap sharpener at Harbor Freight, and it may improve a beater blade. But if you care about edge life and consistency, prioritize angle control and a clean grit progression.
If you want a simple guided setup built for repeatable results, explore knife sharpeners and a bundled knife sharpening kit. If you want a flexible platform that handles many blade shapes, the apex knife sharpener pairs well with knife sharpening tools and a quality sharpening stone.
Preparing Your Knife and Scissors
Prep takes two minutes and prevents most mistakes.
Safety First
Set your sharpener on a stable surface. Keep your work area clear. Hold the knife with your non dominant hand only when the blade stays fully supported on the platform. Keep fingers behind the edge. Keep the blade perpendicular to your body when you reposition, not pointed toward you.
For scissors, open them fully when you inspect them. Close them when you move them. Treat them like any other tool with a live edge.
Cleaning Tools Before Sharpening
Wipe the blade with warm soapy water, then dry it. Grease and grit can clog abrasives and scratch finishes. Clean scissors the same way, especially if adhesive or tape residue built up.
Skip quick hacks like dragging the edge on a cutting surface. Also avoid sharpening right after using a glass cutting board, since glass can create small rolls or chips that change the feel of the edge.
Inspecting the Blade
Look for chips, flat spots, or a rolled apex. Run a thumb lightly across the spine, never across the edge. Check reflection under light. A true apex reflects very little. A dull area reflects a bright line.
This is how you measure the effectiveness later. If the reflection line disappears after sharpening, your edge improved.
How to Sharpen a Knife with a Knife Sharpener
Use these steps for a guided sharpener and stones. They also translate well to most systems that let you control angle and pressure.
- Set the angle: Choose your target edge angle and lock it in. Aim for a consistent angle across the full pass.
- Start with the right abrasive: If you have a dull knife, begin with a coarse abrasive. If the knife still has a decent edge, start finer to remove less metal.
- Stabilize the blade: Keep the knife flat on the platform. Use your non dominant hand to steady the spine only when it stays safe.
- Work heel to tip: Begin at the heel, then sweep toward the tip in smooth strokes. Maintain a constant angle as you follow the curve.
- Use even pressure: Apply consistent pressure on the first passes. Do not crush the stone into the edge. Your goal is controlled abrasion, not force.
- Raise a burr: Continue until you feel a burr along the entire knife edge. This confirms the bevel reached the cutting edge.
- Switch sides: Repeat on the other side until you raise a burr back. Keep even pressure on both sides so the apex stays centered.
- Refine the edge: Move to a finer abrasive and repeat lighter passes. Lighter strokes reduce burr size and clean up scratch patterns.
- Deburr and finish: Use very light alternating strokes. Then finish on a leather strop if you have one. A strop can improve bite and reduce the “wire” feel.
- Test safely: Use the paper test. A sharp knife should slice clean with minimal snagging. You can also test on a tomato skin or receipt paper.
Quick scissors method with a guided sharpener (when your system supports it):
- Identify the beveled side on each scissor blade.
- Set an angle that matches the existing bevel and keep it consistent.
- Make controlled passes until you raise a small burr on the back side.
- Remove the burr with light strokes or a ceramic rod style hone.
- Test by cutting paper, then clean and lightly oil the pivot.
Common Mistakes to Avoid
- Changing the edge angle mid-stroke and losing a consistent angle.
- Pushing too hard and removing more material than needed.
- Skipping grit steps and expecting a coarse edge to feel finished.
- Ignoring the burr and stopping before the bevel reaches the cutting edge.
- Grinding the tip incorrectly and rounding it off.
- Using a pull-through sharpener on knives with thin geometry when you want control.
- Treating serrated knives like plain edges and damaging serrated edges.
- Sharpening a dirty blade and clogging abrasives with grease.
- Using a glass cutting board and blaming the sharpener for rapid dulling.
- Confusing honing with sharpening. A honing rod or honing steel maintains alignment, but it does not replace knife sharpening when the edge is dull.
Conclusion
A sharp edge is a routine, not a rescue mission. Pick a sharpener that matches your knives, set a repeatable angle, and follow a simple progression. Keep the blade stable, use even pressure, and let abrasives do the work. When you finish with light strokes and a clean deburr, you get a sharp edge that lasts.
For more technique help, check Knife Sharpening tips and build a setup around knife sharpeners, a solid knife sharpening kit, an apex knife sharpener, and the right knife sharpening tools paired with a dependable sharpening stone.
Frequently Asked Questions
What is the correct way to use a knife sharpener?
Use a knife sharpener on a stable surface, set the edge angle, and keep a consistent angle through each stroke. Start coarse only when needed, raise a burr along the full knife edge, then refine with lighter passes. Finish by removing the burr so the cutting edge feels clean.
Do I push or pull when sharpening a knife?
Follow the method your system is designed for. Many guided systems use controlled edge-leading or edge-trailing strokes. Either can work if you hold a constant angle and apply consistent pressure. If you pull too hard or rush, you can round the apex and lose sharpness.
Is it safe to sharpen scissors with a knife sharpener?
It can be safe when your sharpener supports scissors or when you use the correct attachment. Focus on the beveled side only, match the existing angle, and use light strokes. If the tool is not designed for scissors, you risk uneven contact and poor results.
How do I know when my knife or scissors need sharpening?
Watch performance. If your knife crushes tomato skins, slips on onions, or fails the paper test, it needs knife sharpening. If scissors fold paper instead of cutting clean, they need attention. Also check reflection. A bright line on the edge often points to dull spots.
Can I damage my knives by using a knife sharpener?
Yes, if you use the wrong angle, too much pressure, or an overly aggressive tool. A pull-through sharpener can remove extra steel quickly. A guided system helps prevent damage because it supports repeatable angle control and encourages lighter technique during the final steps.